Components
COMPONENTS
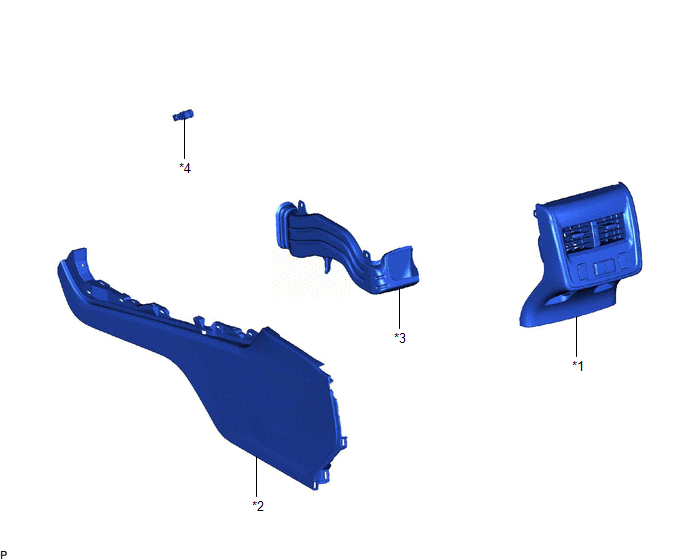
ILLUSTRATION
|
*1 | CONSOLE REAR END PANEL SUB-ASSEMBLY |
*2 | NO. 2 BOX SIDE PANEL |
|
*3 | NO. 3 CONSOLE BOX DUCT |
*4 | NO. 5 INTERIOR ILLUMINATION LIGHT SUB-ASSEMBLY |
Inspection
INSPECTION
PROCEDURE
1. INSPECT NO. 5 INTERIOR ILLUMINATION LIGHT SUB-ASSEMBLY
|
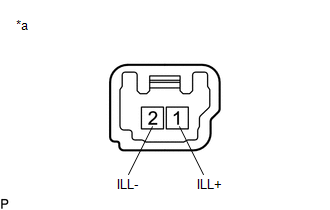
*a | Component without harness connected (No. 5 Interior Illumination Light Sub-assembly) |
(a) Apply auxiliary battery voltage to the No. 5 interior illumination light sub-assembly and check that the light illuminates.
OK:
|
Measurement Condition | Specified Condition |
|---|---|
|
Auxiliary battery positive (+) → 1 (ILL+) Auxiliary battery negative (-) → 2 (ILL-) |
Console box light illuminates |
If the result is not as specified, replace the No. 5 interior illumination light sub-assembly.
Installation
INSTALLATION
PROCEDURE
1. INSTALL NO. 5 INTERIOR ILLUMINATION LIGHT SUB-ASSEMBLY
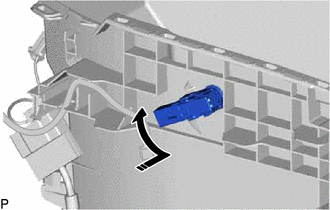
(a) Turn the No. 5 interior illumination light sub-assembly as shown in the illustration to install it.
 |
Install in this Direction |
(b) Connect the connector.
2. INSTALL NO. 3 CONSOLE BOX DUCT
Click here

3. INSTALL NO. 2 BOX SIDE PANEL
Click here
4. INSTALL CONSOLE REAR END PANEL SUB-ASSEMBLY
Click here
5. INSTALL CONSOLE ASSEMBLY
Click here
Removal
REMOVAL
PROCEDURE
1. REMOVE CONSOLE ASSEMBLY
Click here 
2. REMOVE CONSOLE REAR END PANEL SUB-ASSEMBLY
Click here
3. REMOVE NO. 2 BOX SIDE PANEL
Click here
4. REMOVE NO. 3 CONSOLE BOX DUCT
Click here
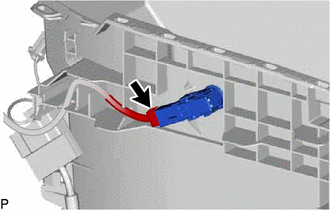
5. REMOVE NO. 5 INTERIOR ILLUMINATION LIGHT SUB-ASSEMBLY
| (a) Disconnect the connector. |
|
(b) Turn the No. 5 interior illumination light sub-assembly as shown in the illustration to remove it.

 |
Remove in this Direction |
Toyota Avalon (XX50) 2019-2022 Service & Repair Manual > Automatic Transaxle System: Pressure Control Solenoid "L" Circuit Short to Battery (P08BA12). Pressure Control Solenoid "L" Circuit Short to Ground or Open (P08BA14). Internal Control Module EEPROM Data Memory Failure (P062F44)
Pressure Control Solenoid "L" Circuit Short to Battery (P08BA12) DESCRIPTION Changing gears is performed by the ECM turning the solenoid (SL1, SL2, SL3, SL4, SL5 and SL6) valves on and off. If an open or short occurs in any of the solenoid valve circuits, the ECM controls the remaining normal soleno ...