Components
COMPONENTS
ILLUSTRATION
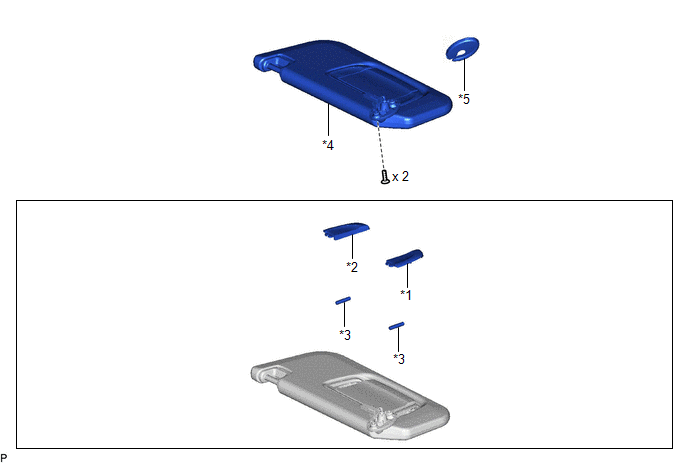
|
*1 | FRONT LENS HOLDER LH |
*2 | FRONT LENS HOLDER RH |
|
*3 | VANITY LIGHT BULB |
*4 | VISOR ASSEMBLY |
|
*5 | VISOR BRACKET COVER |
- | - |
Inspection
INSPECTION
PROCEDURE
1. INSPECT VISOR ASSEMBLY LH
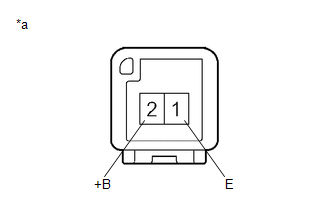
| (a) Apply auxiliary battery voltage to the visor assembly LH and check that the lights illuminate. OK:
If the result is not as specified, replace the bulb or visor assembly LH. |
|
2. INSPECT VISOR ASSEMBLY RH
| (a) Apply auxiliary battery voltage to the visor assembly RH and check that the lights illuminate. OK:
If the result is not as specified, replace the bulb or visor assembly RH. |
|
Installation
INSTALLATION
CAUTION / NOTICE / HINT
HINT:
PROCEDURE
1. INSTALL VANITY LIGHT BULB
(a) Install the 2 vanity light bulbs to the visor assembly.
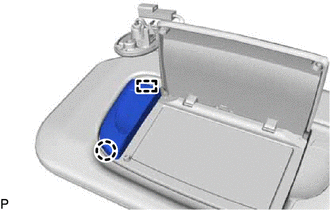
2. INSTALL FRONT LENS HOLDER LH
| (a) Engage the guide and claw to install the front lens holder LH. |
|
3. INSTALL FRONT LENS HOLDER RH
HINT:
Use the same procedure as for the front lens holder LH.
4. INSTALL VISOR ASSEMBLY
Click here 
5. INSTALL VISOR BRACKET COVER
Click here
Removal
REMOVAL
CAUTION / NOTICE / HINT
HINT:
PROCEDURE
1. REMOVE VISOR BRACKET COVER
Click here 
2. REMOVE VISOR ASSEMBLY
Click here
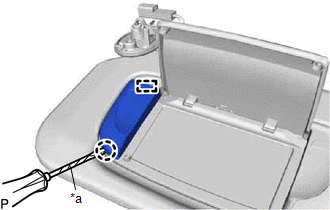
3. REMOVE FRONT LENS HOLDER LH
| (a) Using a screwdriver with its tip wrapped with protective tape, disengage the claw and guide to remove the front lens holder LH. |
|
4. REMOVE FRONT LENS HOLDER RH
HINT:
Use the same procedure as for the front lens holder LH.
5. REMOVE VANITY LIGHT BULB
(a) Remove the 2 vanity light bulbs from the visor assembly.
Toyota Avalon (XX50) 2019-2022 Service & Repair Manual > Can Communication System(for Gasoline Model): Check Bus 5 Line for Short to +B
DESCRIPTION There may be a short circuit between one of the CAN bus lines and +B when there is no resistance between terminal 15 (CA5H) of the central gateway ECU (network gateway ECU) and terminal 16 (BAT) of the DLC3, or terminal 16 (CA5L) of the central gateway ECU (network gateway ECU) and termi ...